
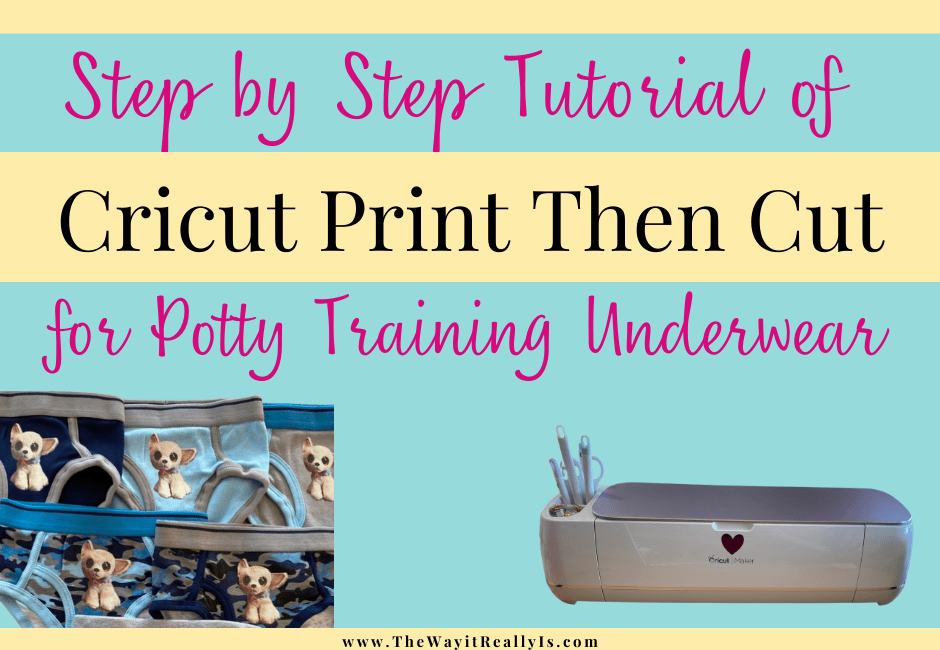
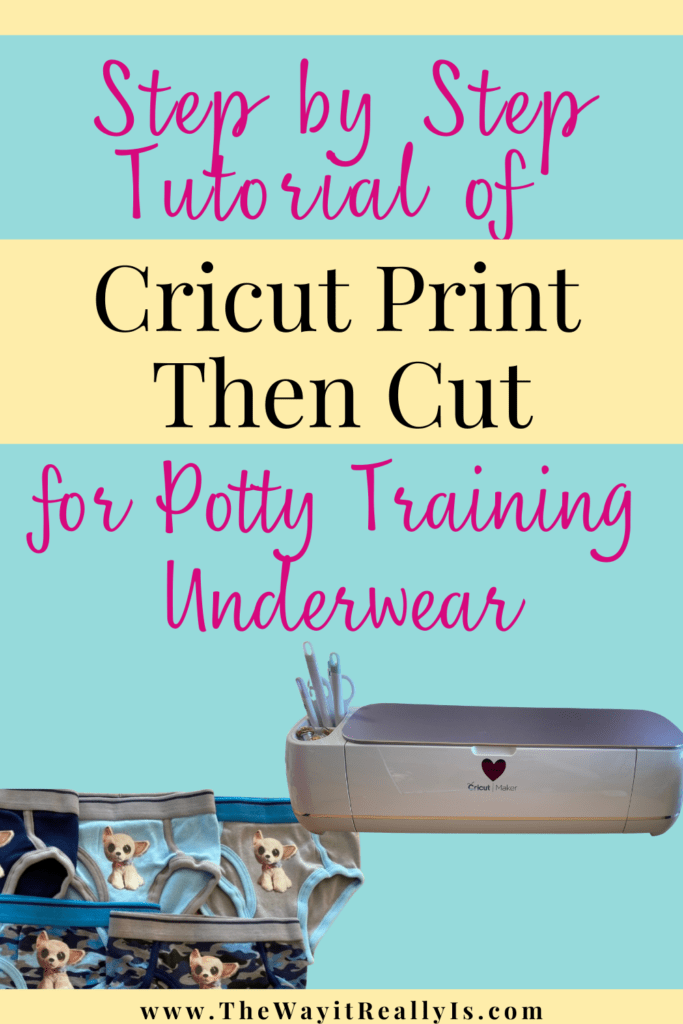
Do you have a Cricut and have been wondering how to do Print then Cut? Here is a simple tutorial of Cricut print then cut for you based on me creating personalized underwear for my son to encourage him in potty training.
Note: As an Amazon Affiliate I earn from qualifying purchases made through affiliate links, at no extra cost to you. Read my full disclosure for more information.
The Premise
One of my 3-year-old twins was potty training and we let him pick out his own underwear to make it feel more special. My husband had pulled up several options on Amazon to see which he preferred. There were many pairs of underwear with dinosaurs on them, monster trucks, Paw Patrol…you know, all the things he likes. He immediately picked out ones that were rather plain and then told us he wanted “Chewy” his favorite stuffed animal to be on them.
An idea was born.
See, I had put his beloved Chewy on a shirt of his about a month earlier, so he knew I had the capability. I love that this was his first thought though. He wanted something that was just his, which is hard to get when you’re an identical twin plus have an older brother, something that no one else would have.
Materials for Cricut Print then Cut
Here is the list and explanation then I’ll link the items below to buy on Amazon:
- Item to take a picture of or other image you’d like to use
- Cricut Machine
- Computer with Design Space will work best though you could use a phone with the Design Space app as well
- Blue Cricut Light Grip Mat
- Printable Iron-On Vinyl: it’s ok to use the one that says for dark shirts or light shirts, works the same in my experience.
- Cricut Mini-Press if you’re putting a design on a small item like kids’ underwear
- or Cricut Easy Press if you’re putting a design on a shirt or something larger
- You could do this with a regular iron but honestly, having the Mini-Press and/or Easy Press make life SOOOO much easier when it comes to iron-on items.
- Easy-Press Heat Resistant Mat you’ll want this underneath what you are putting the design on, much like an ironing board but works better than an ironing board for pressing items onto shirts.
- Basic Cricut Tools will help you easily and carefully remove the cut out image and apply to your clothing item.


![Cricut EasyPress Mat, Protective Heat-Resistant Mat for Heat Press Machines and HTV and Iron On Projects, [12 x 12 ] (2004475)](https://m.media-amazon.com/images/I/41FNKJcKcfL._SL500_.jpg)

Step 1: Take a picture of the item that you want to be printed then cut.
I have really nice digital cameras but these days I just use my iPhone to take pictures.
I already had a picture of Chewy on my phone because of course I had done a photoshoot with the beloved stuffed animal, and his pal Moose, months ago. Luckily this was before he had so much wear and tear.
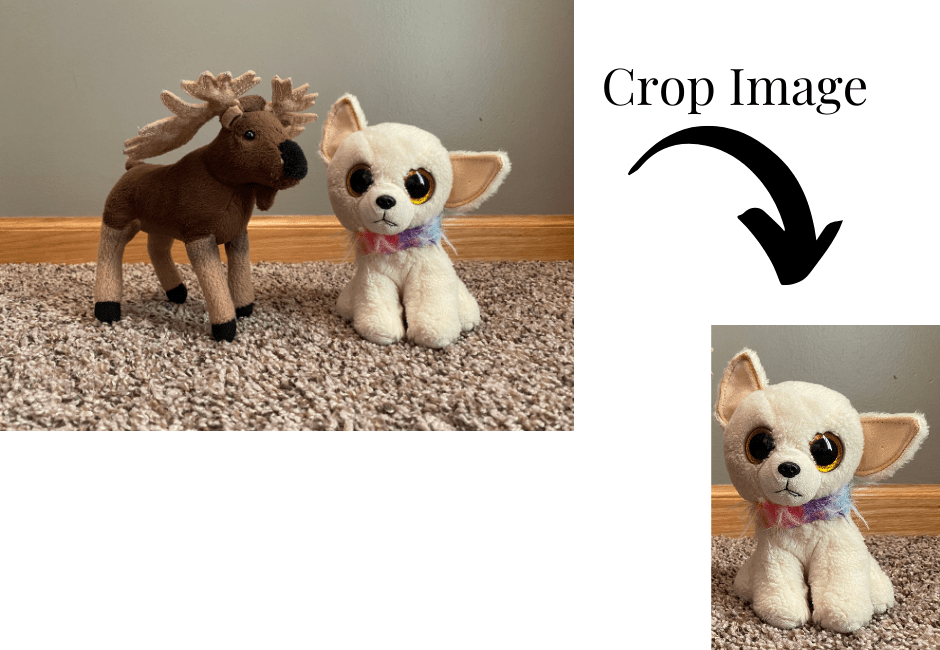
Step 2: Once I cropped the image on my phone, I uploaded it into the Cricut Design Space App on my phone & removed the background.
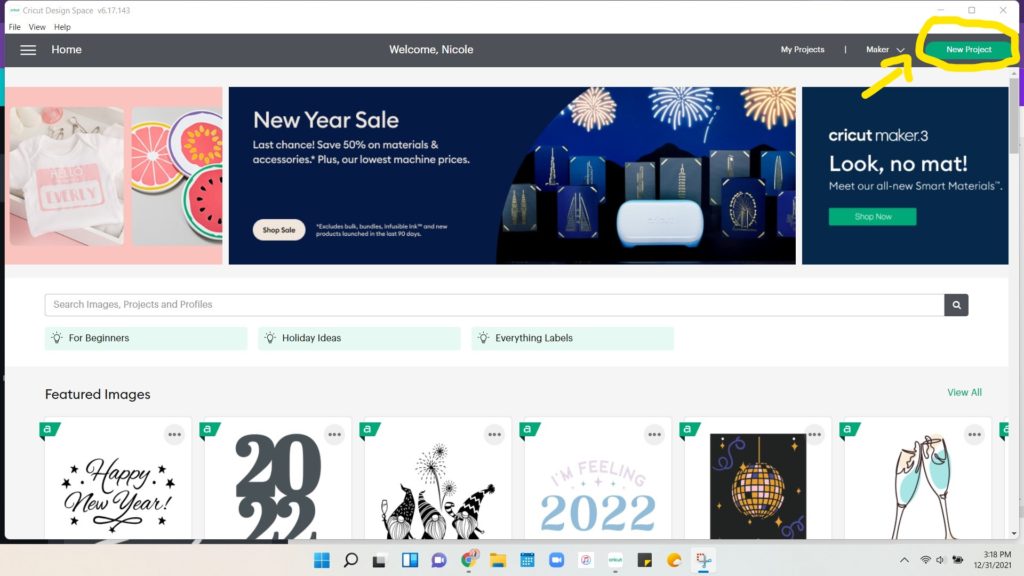
Below I show that on the first screen I got into the Cricut Design Space app and selected “Canvas” in the top right corner. I also could have selected “New Project.”
Next I selected upload from the bottom of the screen.
From the menu that popped up, I selected a photo from my photo library.
I found the photo and selected it to be uploaded to Design Space.
From there, I erased around the item until all that was left was Chewy (not fully shown here, I had done it previously and didn’t have the patience to do it again LOL). I used the Remove button first but since he’s white it erased some of him so ended up having to go with the traditional Erase feature.
If you’re doing this on a computer, it would likely work better.


Step 2.5: If you edit the photo on your computer (much easier)
Editing the photo on your computer may work better for some photos, as I found with this one.
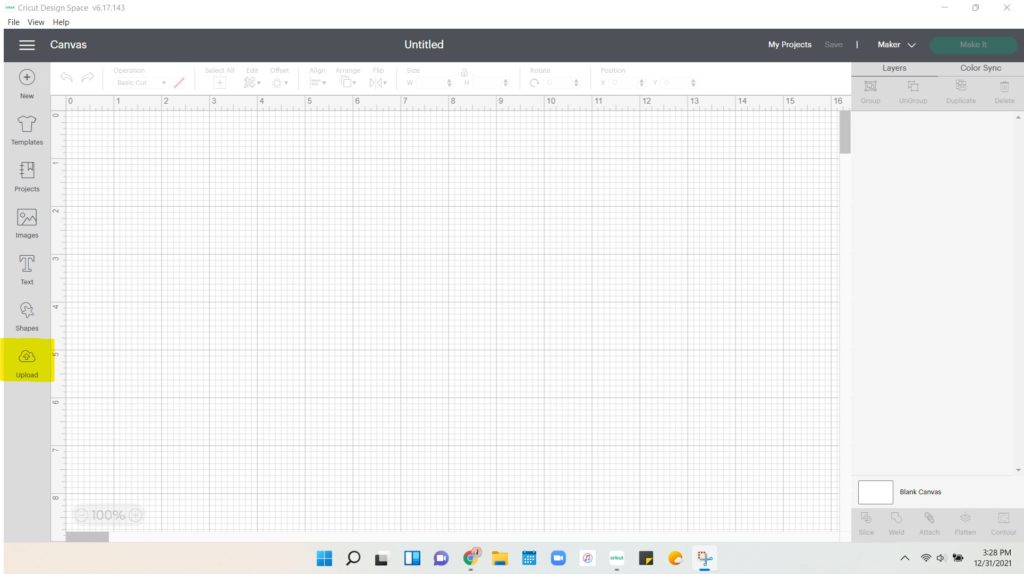
Open Design Space and select “New Project” in the top right corner of the screen, which I have circled in yellow.
You’ll be taken to this view when you select “New Project”. Then select “Upload” which I have highlighted here in yellow.
After selecting “Upload” you’ll be taken to this screen. Select “Upload Image” which I have highlighted below in yellow.
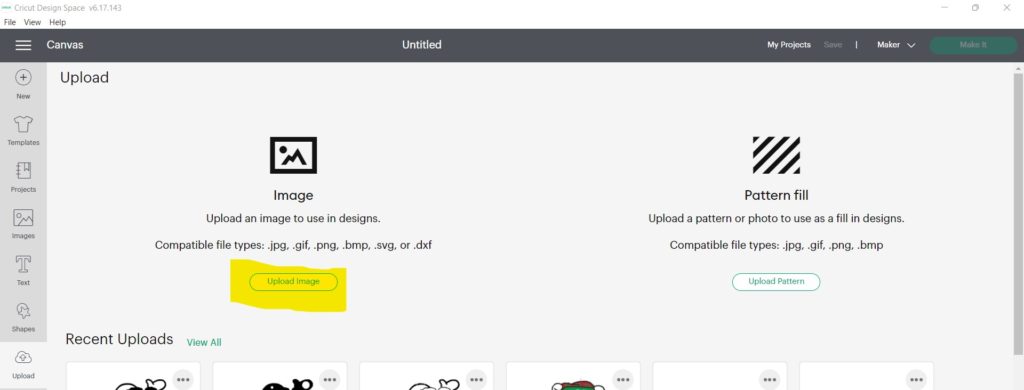
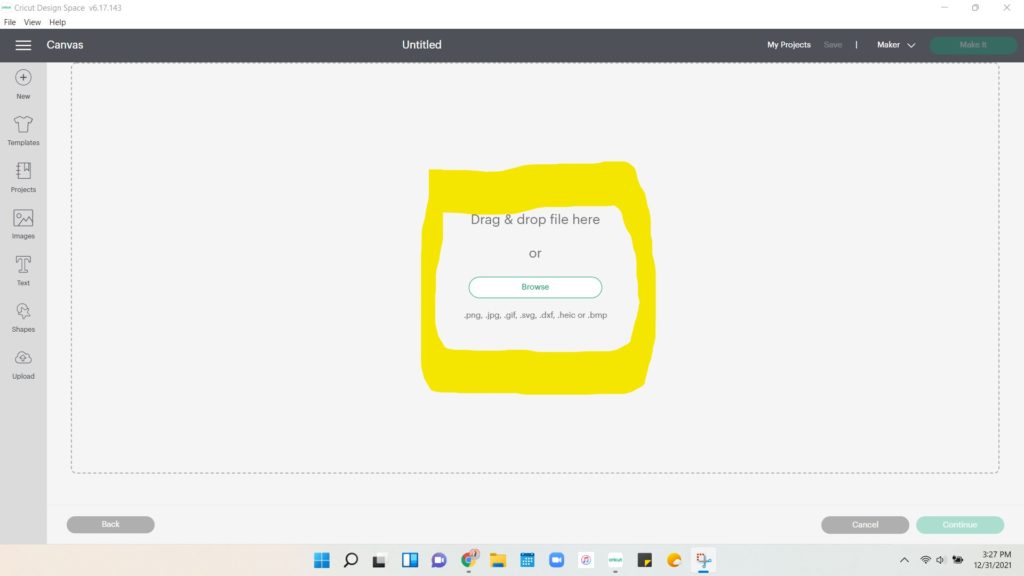
Once you select “Upload Image” you’ll be taken to the screen below. You can drag and drop a file there if you have it handy or click on “Browse” to find it within your computer files.
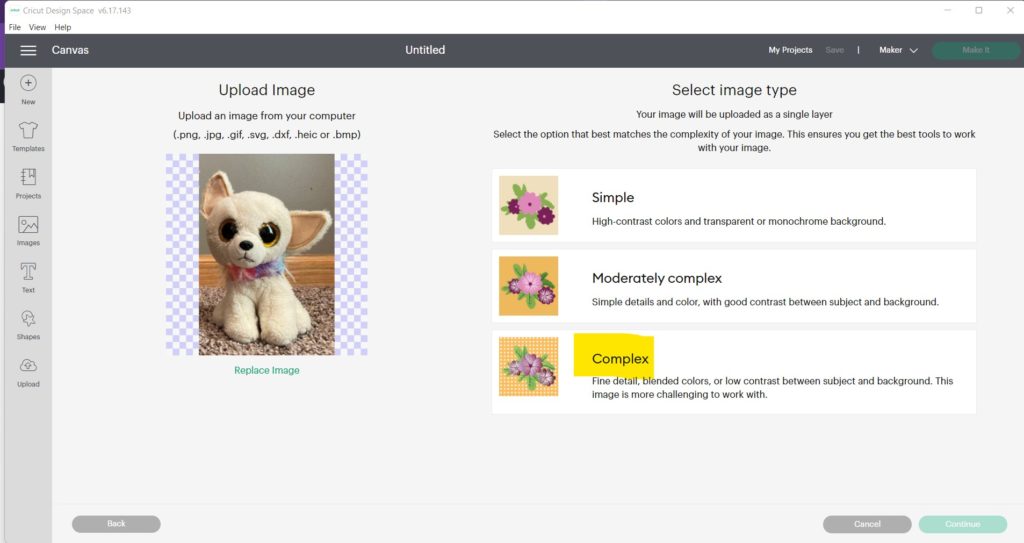
Once I found my photo I clicked open and then the screen below appeared to show my photo. I selected “Complex” to the right as I highlighted.
Feel free to toggle through the different options from Simple to Moderately Complex to Complex to see which may fit your image best. I tend to go with Complex when it comes to photos but if it’s just words then I may go with simple. I’m still playing around and learning as well.
Once you’ve selected the image type, click “Continue” which will then light up in green on the right bottom corner of your screen.
Now Chewy is ready to have the background removed to show just him in all of his glory. I always start with clicking “Remove Background” to the left to see if it can be as easy as doing that without any other work. With some things that works great, with others, not so much. You can always select “Undo” if you decide you don’t like it (looping back arrow on the screen.)
*Note: the easy one-touch “Remove Background” feature is ONLY available to Cricut Access Subscribers. You can subscribe by signing into your Cricut account and choosing either the monthly or yearly plan. The subscription gives you unlimited access to thousands of photos, fonts, projects, etc. beyond just the Remove Background feature. I went month to month for the first several months and then decided I used it enough that it just made sense to do the yearly subscription since it comes out cheaper in the end.
If you don’t have Cricut Access you can use the Manual “Select” feature to remove the background as well. This will take a bit longer but typically works pretty well. If there are still some areas that need to be erased you can use the “Erase” tool also under the Manual menu bar underneath where I highlighted.
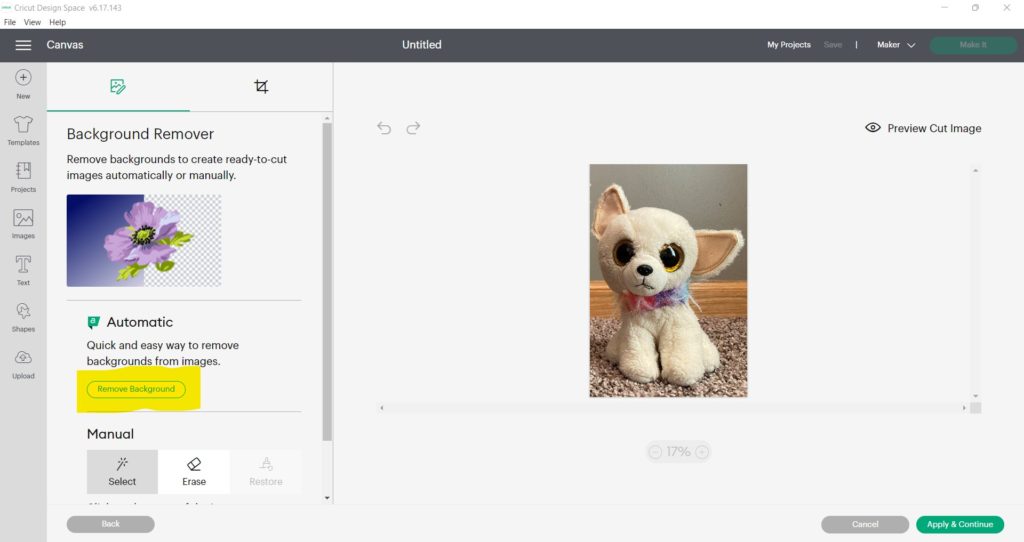
Lucky for me, this photo did much better on my computer than it did on my phone. All I had to do was use the Automatic background remover and it removed the background perfectly! If I hadn’t been happy with it, I could have pressed the “Revert” button which is now in place of the “Remove Background” button and start from scratch.
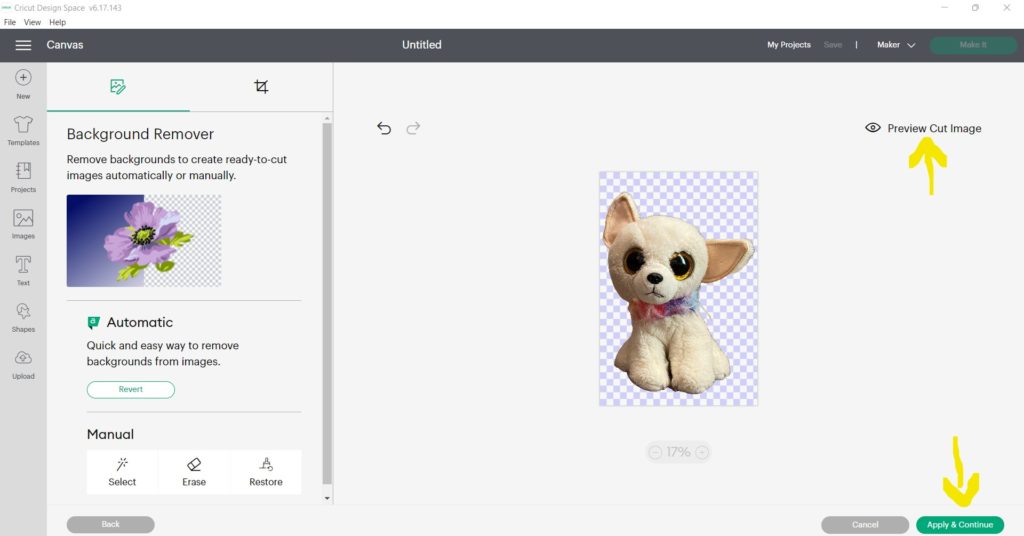
If you want to see what your image will look like once it’s cut out, click on “Preview Cut Image” which I put a yellow arrow pointing up underneath. This really helps especially when you’ve had to do some manual removing of the background because it’s easy to miss a speck here and there. A speck may seem like it won’t matter but the Cricut sees this and will cut it out. If you have a lot of specks all over, it’ll take FOREVER to cut when it really doesn’t need to, so ensuring it’s all cleared up is best.
Once you’re done editing, you can select “Apply & Continue” that I’ve drawn a yellow arrow down to.
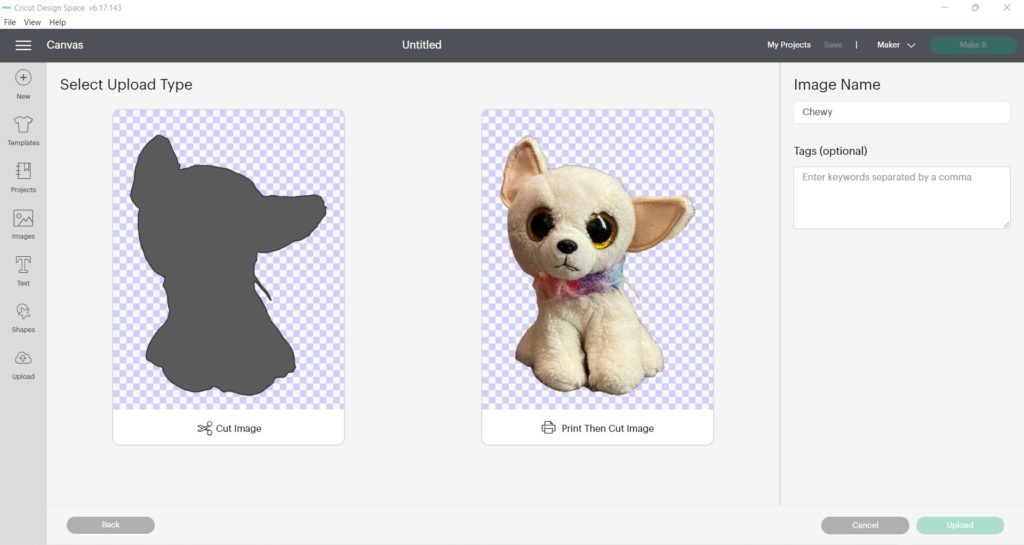
Now that Chewy is all cleaned up, you’ll see this screen asking about Upload Type. For a Print Then Cut Image like we’ve been working on, you’d select “Print Then Cut Image”.
If you were working on a saying that you were going to cut out in vinyl, that would be a time to do “Cut Image”.
But for this case, select “Print Then Cut Image” which is the Chewy in full color. Once you’ve selected him, select the green “Upload” button.
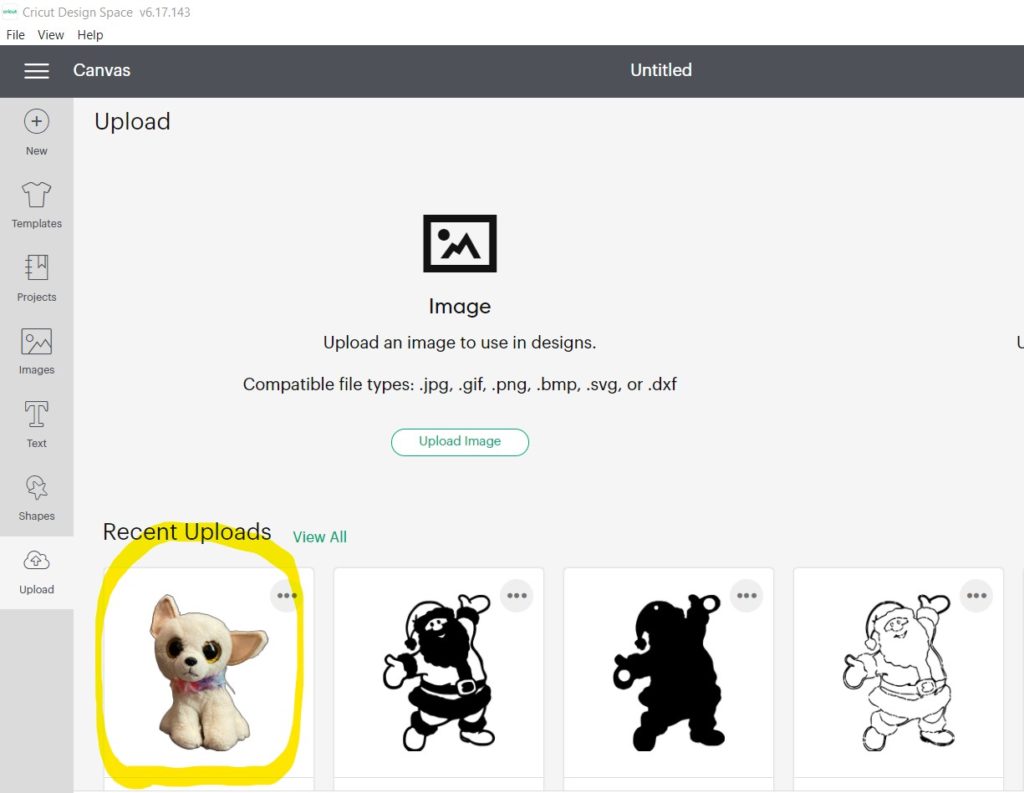
Now you’re sent back to the main Upload page that we started on and you can see Chewy is the first of my Recent Uploads, as I’ve circled him in yellow. Select the image you just edited by clicking on it and then in the bottom right corner an “Add to Canvas” button will show up in green. Select that button.
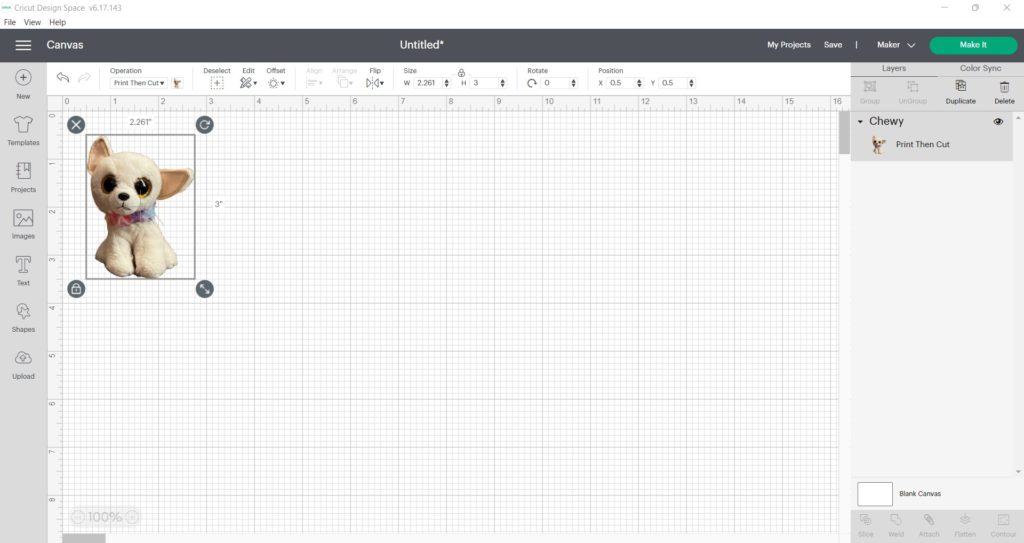
Step 3: Resize Picture on Canvas
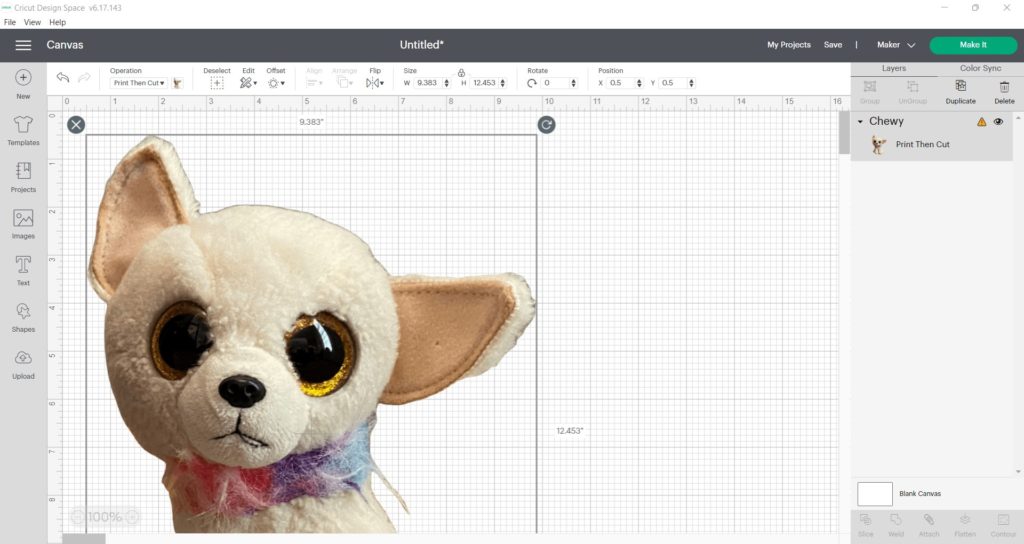
Yay! Chewy is now on my canvas. But he’s HUGE!!! He’s also got the dreaded caution sign next to him on the right meaning he’s too big to cut! It’s ok, we can size him down. .
Click on your image, in my case Chewy, and a box will appear around him. Scroll down to see the entire image if it’s huge like mine.
I scrolled down to see the bottom of the image and the double arrow that shows I can drag it to either make the image bigger or smaller, I’ve circled this double arrow in yellow below. I’ve also drawn an arrow showing which direction to drag the double arrow in order to make the image smaller (drag to the upper left).

I dragged that double arrow up toward Chewy and made him significantly smaller. As you can see, on the right panel it no longer has the caution sign, which is good!
You’ll see as you drag the double arrow, it shows you how many inches across your image is in terms of length and width. You also can edit this precisely if you select “Size” and input for W and H (Width and Height) the size you’d like.
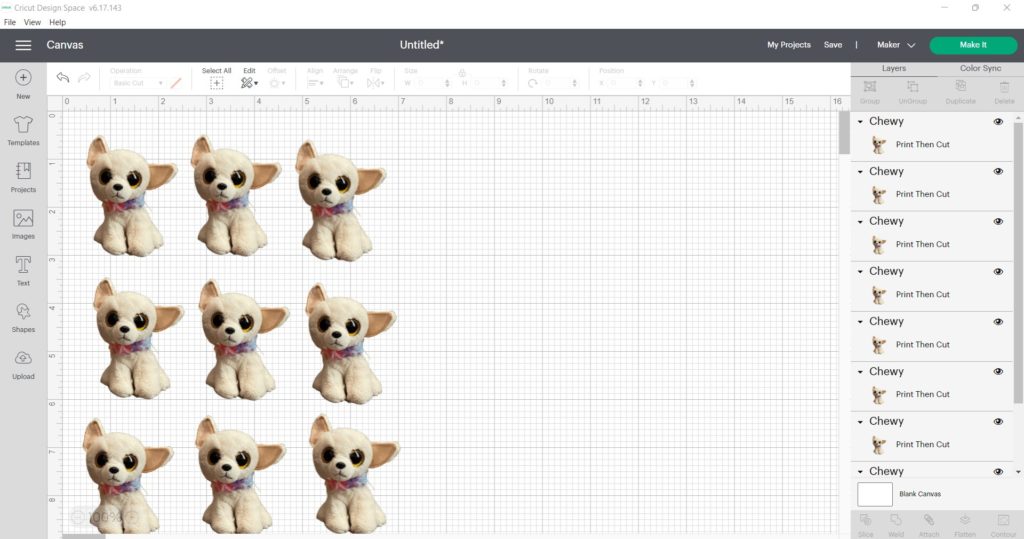
Step 4: Duplicate as Needed
Since I had 8 pairs of my son’s underwear that needed Chewy on them, I needed to make more Chewys to fit the page. Once I got Chewy to the size that would fit on his underwear (I measured his underwear first to be sure) I made copies.
To make copies of Chewy easily I clicked on Chewy then selected Ctrl and C at the same time. This is a typical keyboard shortcut that can also be used in Cricut Design Space. This will copy the image. To paste the image onto the canvas I then held down Ctrl and P for paste. I did Ctrl + P multiple times until I had 9 Chewys because I knew that my print then cut vinyl could fit that many based on their size.
You’ll notice in the image below that when I pasted the image it pasted it right on top of the original Chewy. Placement like this won’t matter in terms of printing but I like to spread mine out so I just select the new Chewy and drag him aside so he’s next to the other one and not on top of it.

Now that I’ve got 9 Chewys all laid out I’m almost ready to print. It doesn’t matter if they are perfectly spaced as Design Space will decide how to fit them onto the mat anyway.
My next step is to SAVE! I’ve had too many times where I just flew through without saving and then for whatever reason Design Space froze and I had to start over. Granted, if you have to start over on this, it won’t be from scratch. The image that you uploaded and edited to remove the background will still exist. It just won’t be the size you had changed it to or the number you wanted. So make sure you SAVE.
Once you’ve saved it, click on the green “Make It” button in the upper right corner.
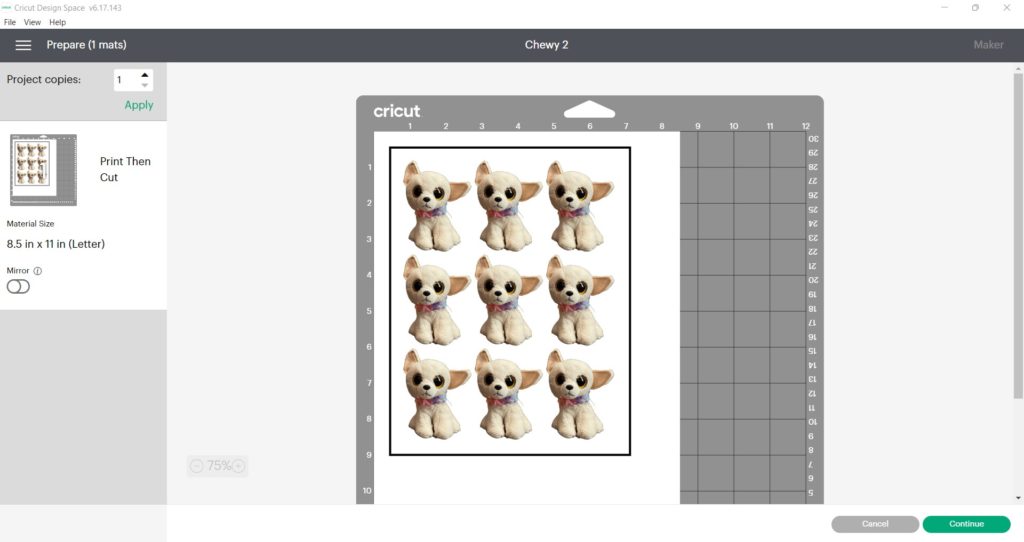
Step 5: “Make It” and Send to Printer
As mentioned in the previous step, once you’ve got enough of the images you want on the screen, click “Make It” and you’ll be brought to the screen below.
On this screen, you’ll see exactly how Chewy, or your image, will look on the printable iron-on vinyl and how it’ll look on your mat. Here it shows that all 9 of mine will fit on one piece of printable iron-on vinyl which is exactly what I want! If yours isn’t looking the way you had hoped you can always press the “Cancel” button to go back and edit the size or amount of images on the page. If yours already is spilling onto 2 pages, you could also go back and put even more on the canvas to be printed. Might as well if you’re already using a page of printable iron-on vinyl!
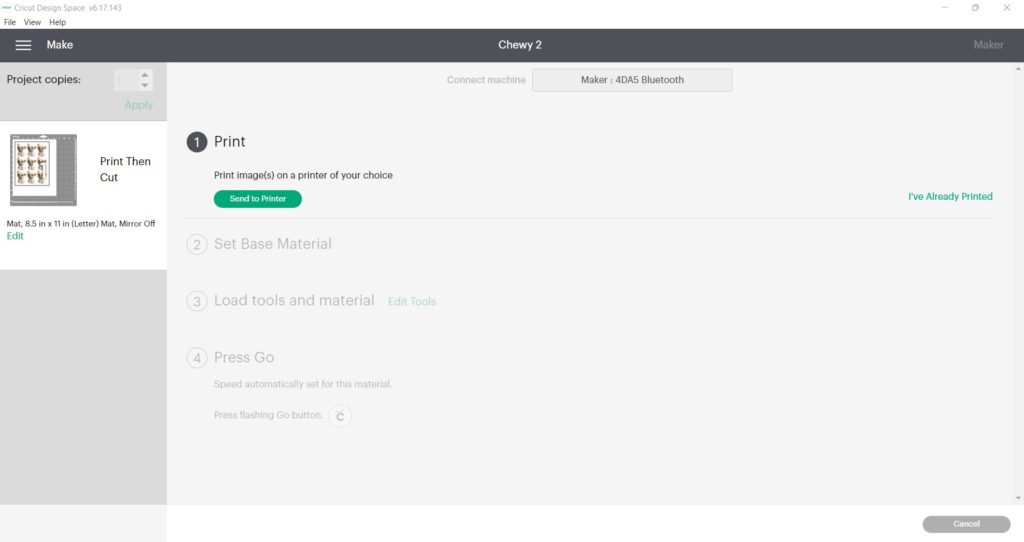
Once you’re satisfied with what you see on this page you can press the green “Continue” button on the lower right of your screen AND turn your machine on.
Once you’ve clicked Continue and turned your machine on, you’ll see the screen below. You can see that I’m using my Maker via Bluetooth to complete this. At this time, gather your printable iron-on vinyl and put a piece face down on your printer, depending on how your printer loads. I know mine works face down but you may want to do a test page on a regular sheet of paper and make a mark on one side of the paper then print something to see which side it prints on.
Once you’ve placed it in your printer face down or however you need it, click the green “Send to Printer” button in Cricut Design Space. Your printer will print out the images onto the iron-on printable vinyl and you’ll be ready to finally use your Cricut!
Step 6: Cut with your Cricut
Now you will take the images you printed and put the printable iron-on vinyl face up/pictures up, aligned to the top left of your blue light grip mat.
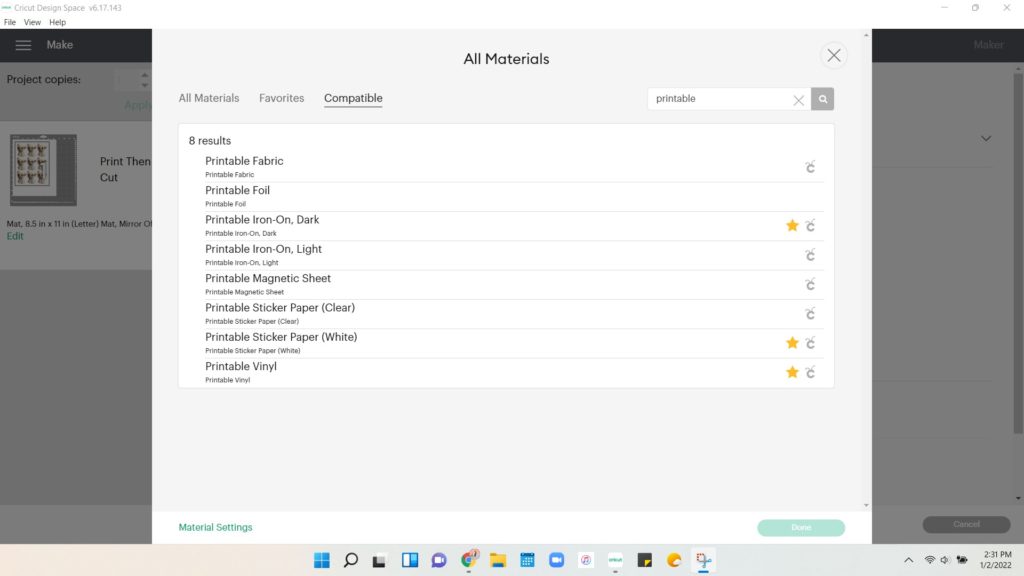
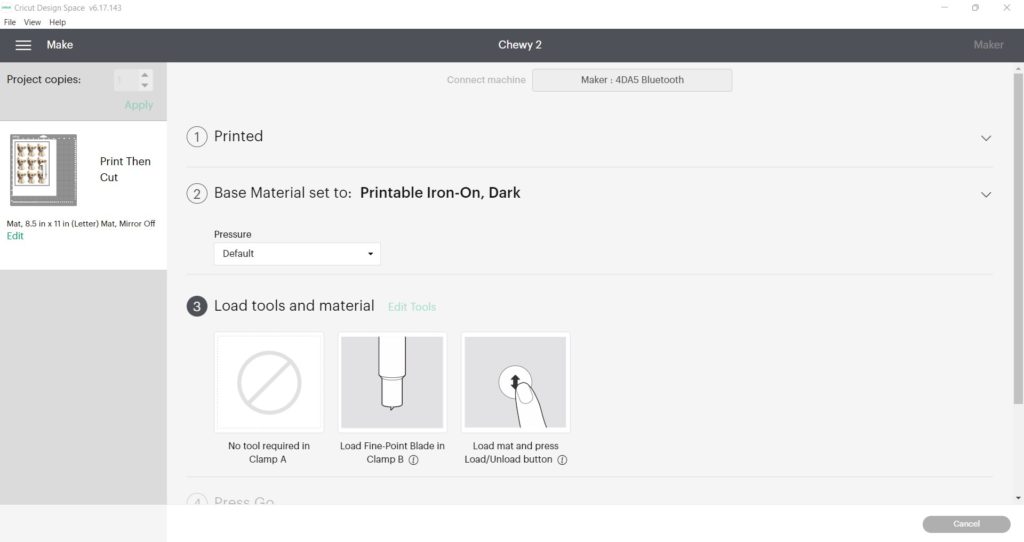
Then go back to your computer and you’ll see that the printed area has closed and now the “2. Set Base Material” is showing. I already have several favorites so you can see that I’ve circled “Printable Iron-On Dark” as that’s what I’m using. If you don’t have that set as a favorite, look below on how to do so.

If you don’t already have Printable Iron-On Dark as a favorite, you can select “Browse All Materials” and then the image below will show up with all materials. In the search bar, type printable which will bring up the list below. You can then see “Printable Iron-On, Dark” is there and you can favorite it from there or just select it for this one time.
Once you’ve selected your base material, you’ll be sent to this part of the page where you can select if you want the pressure to be more, less, or default. I used default as I figure if I need to do “more” I can always cut it again.
Below that, you’ll see “3. Load tools and material”. This shows you the tool you need to have in your Cricut, in this case, the Fine-Point Blade in Clamp B. This is the main tool that came with your Cricut for cutting.
Once that tool is loaded, if it wasn’t in there already, click on the tool, and the arrow will start flashing on your machine for you to insert your mat and with materials.
Click on the flashing arrow on your machine to load your mat with printable iron-on vinyl on it and wait for the Cricut button (C with little antennae), to start flashing. Once it does, press the flashing Cricut button.
What’s going to happen first is that the Cricut is going to turn a cool little light on to survey the mat and make sure that the black outline is where it expects and that it’s ready to cut. Then it’ll start cutting.
Once it’s done cutting, unload the mat by pressing the flashing arrows on the Cricut machine.
Then remove the whole sheet of printable iron-on vinyl from the mat.
Using the tool that looks similar to a dental scraper, loosen one of the corners of your design so you can pull off all of the extra vinyl that isn’t the picture you’re wanting to use. I find this to be easier than pulling up each image but you can do it whichever way is easiest for you.
Step 7: Iron-On the Image
Woot! We’re almost done!
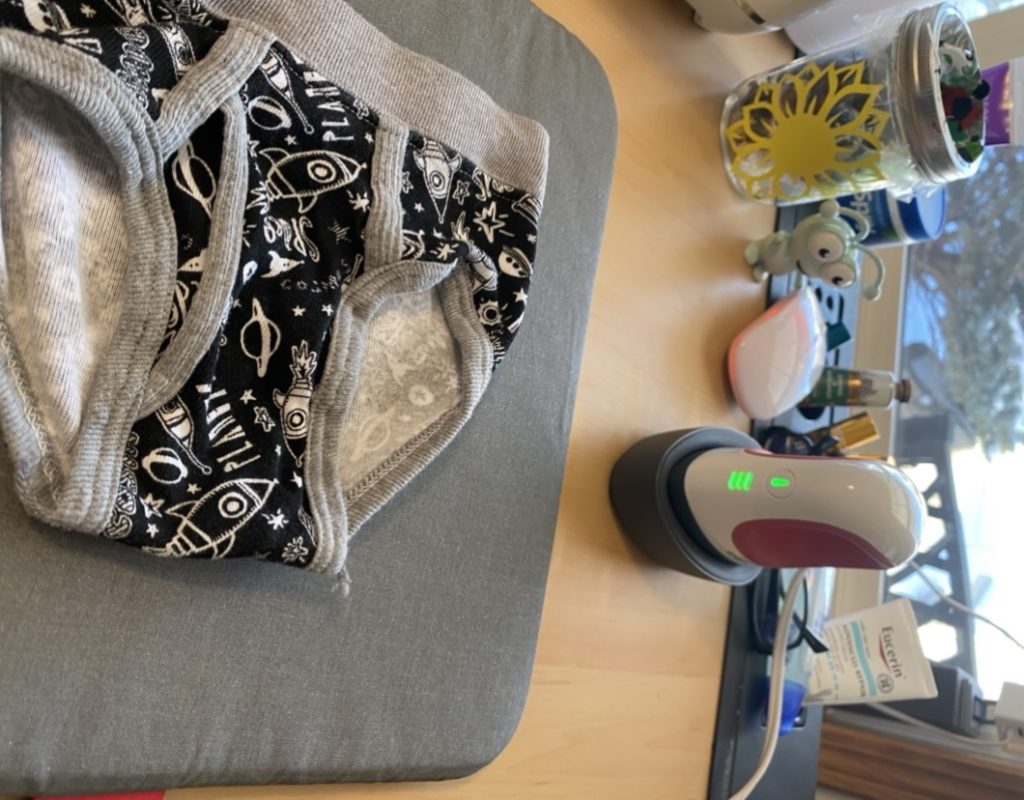
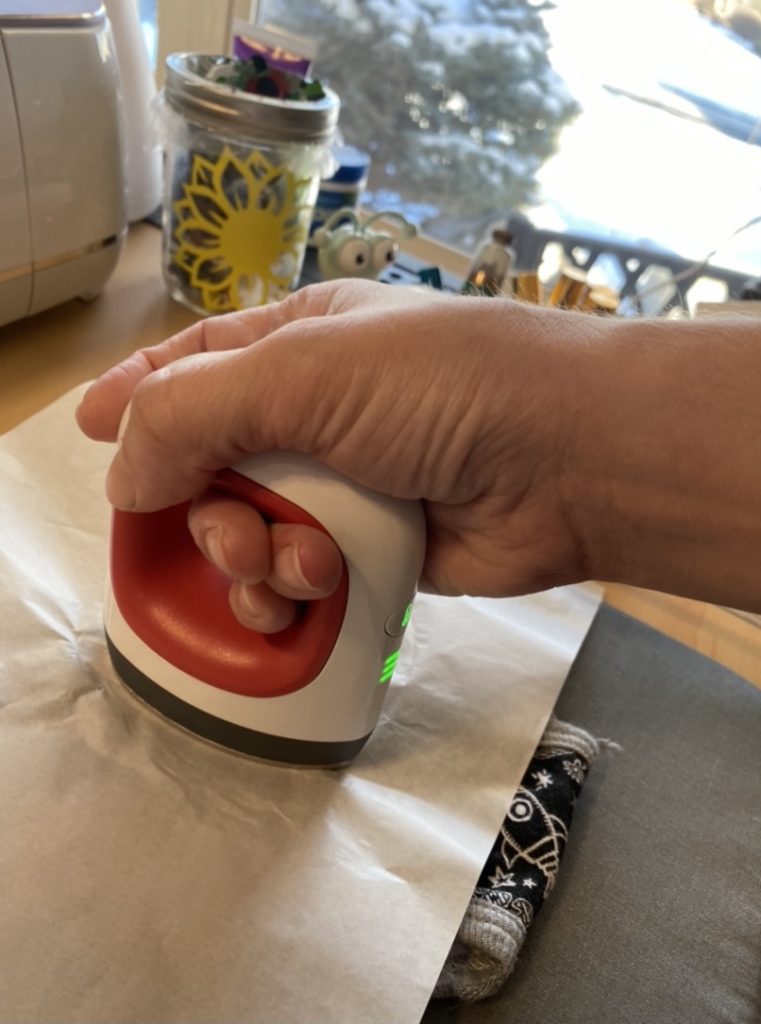
Now get out your Cricut Mini-Press for smaller items or Easy Press 2 for bigger items and plug it in to warm it up.
Notice that for the Easy Press 2 you can set the temperature and seconds on it. Look at the package of Printable Iron-On Vinyl to see instructions on how hot it needs to be and how long it needs to be pressed. For the package that I link above, it says heat to 365 degrees F and set the timer to 12 seconds.
For the Mini-Press the heating is a little less precise. I found that setting it to the highest temperature possible seemed to work well for me. I was able to get 6 of them done before it started making weird marks so I turned the Mini-Press off at that point and let it cool for a bit before turning it back on and finishing the last two pairs.
While that is warming you can get your items ready.
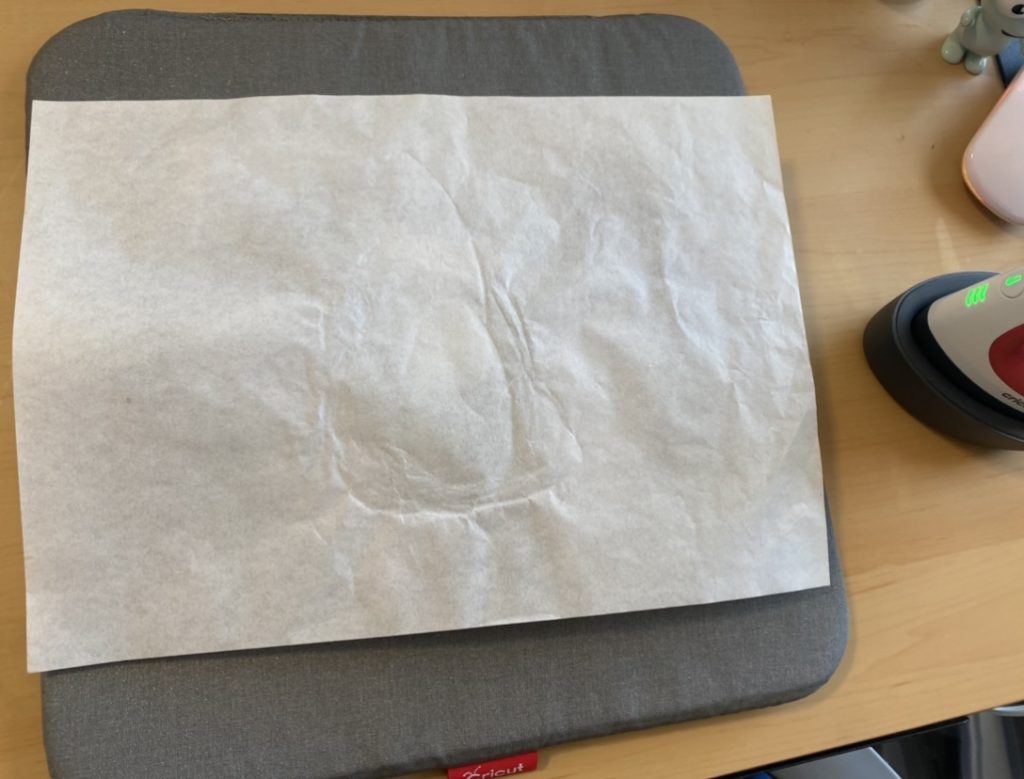
As you can see below, I laid out my mat on my desk and have a pair of my 3-year-old son’s underwear on it waiting for Chewy to be added to it.
Once your Mini-Press or Easy Press is ready (it’ll beep and/or be showing green instead of red lights), you’ll want to preheat the item you’re putting the image on, for about 5 seconds.
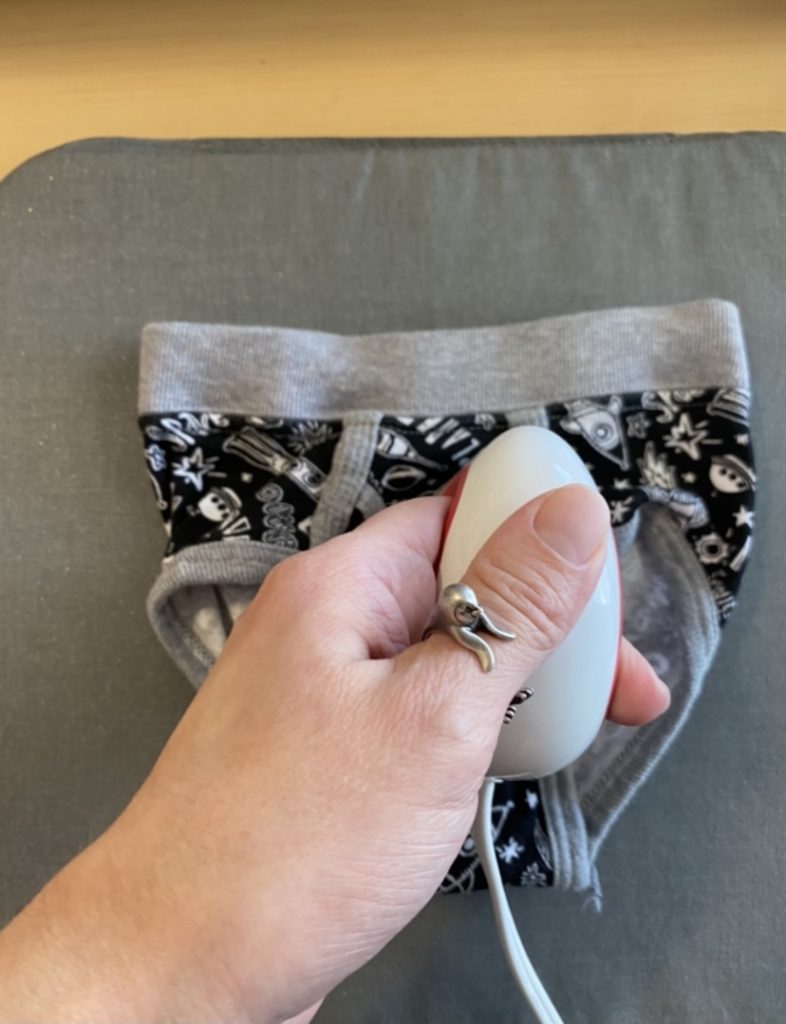
Once you’ve done that, place the image onto the clothing item, so in this case I placed Chewy onto the underwear where I want it to be ironed-on. Cover it with the parchment paper-type material that came with the package of Printable Iron-On Vinyl.
Then apply heat and some pressure to the item over where the image is to ahead here it. Once you’ve done that for 12 seconds, flip it over and press for another 5 seconds (leave the parchment-paper type material adhered to the front over the image as it’s not ready to come off yet).
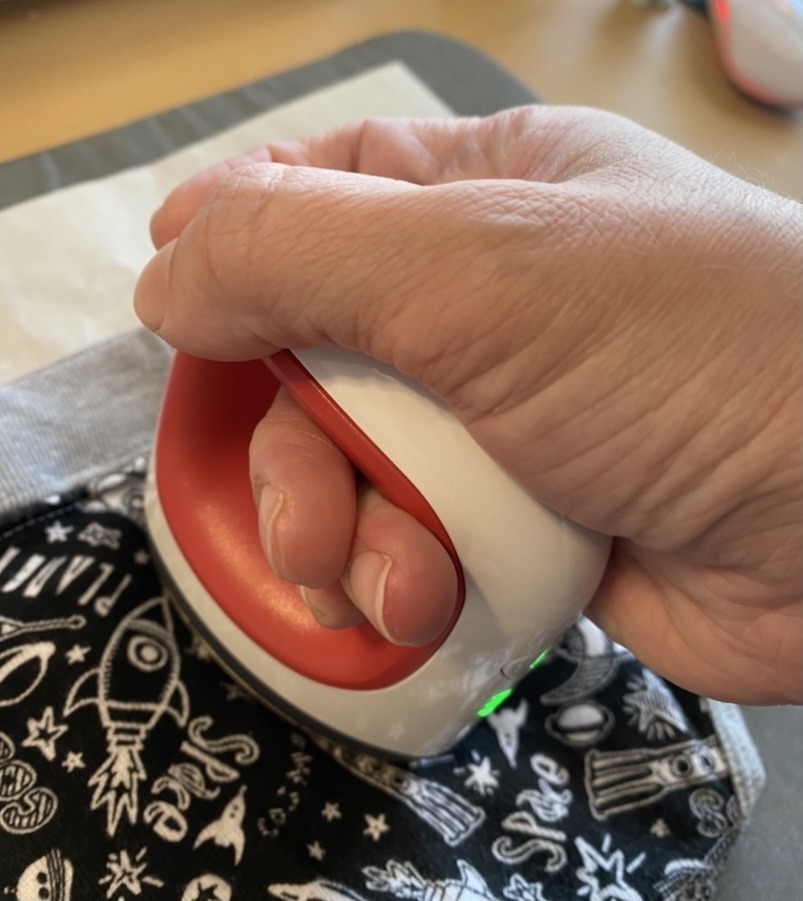
Flip it all back over to show the parchment-paper type material and image. After waiting for it to cool for about a minute go ahead and carefully remove the parchment paper material. If you notice any of the image is peeling up, reapply the parchment paper and press for a few more seconds.
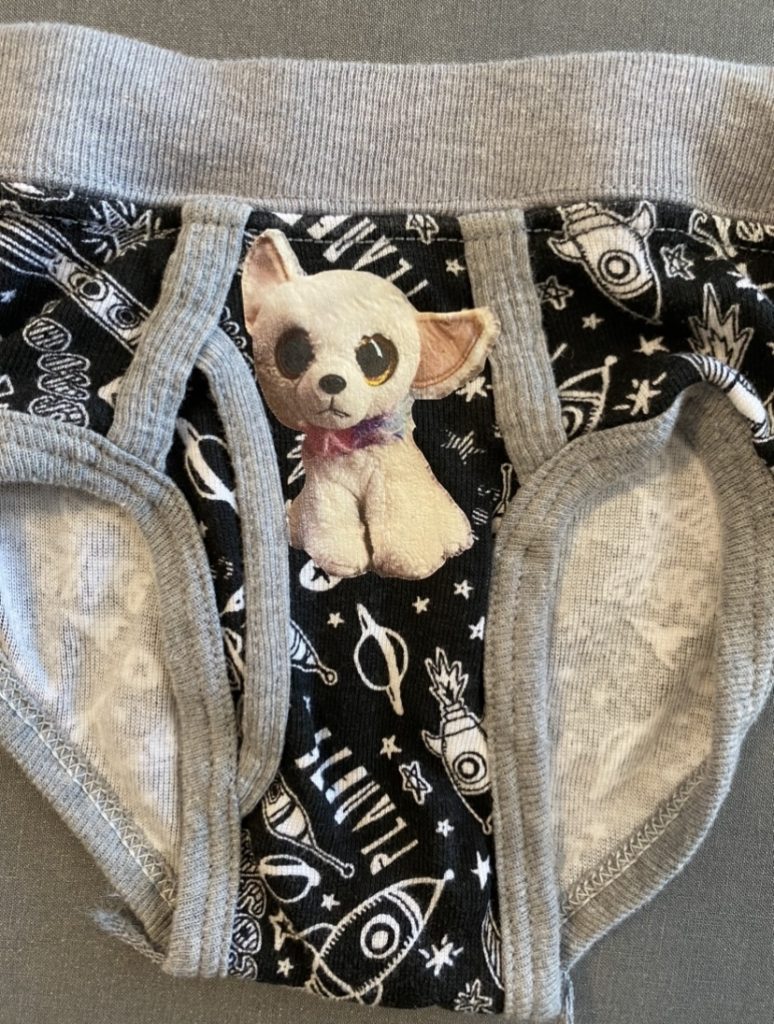
When done, your image and clothing item will be hot so be careful. Let it cool and set a bit before handing it to your little one to inspect. 🙂 Also be sure to turn off your Mini-Press, Easy Press, or Iron and unplug it for safety. Ensure it’s out of the way and won’t be knocked over by littles.
Note: the parchment-paper type material IS reusable so put it back into the packet it came in for your next project. If you’re doing.
If you’re doing more than one item, such as 8 pairs of underwear for your little one, keep going by repeating the warming, pressing, and cooling steps.
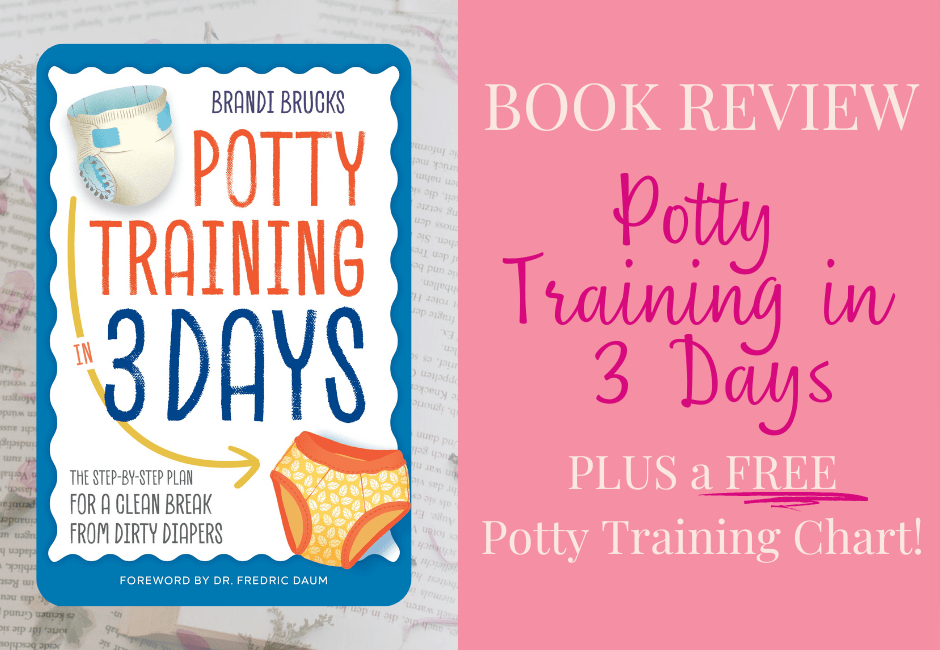
Potty Training Book we used, click on the photo below for my book review
As a mom of identical twins and a son two years older, I have gained invaluable experience in the realm, and chaos, of parenting. With a Master's Degree and Education Specialist Degree in School Psychology, I spent years as a school psychologist, helping children navigate through their educational and emotional challenges. Now as a stay at home mom and professional blogger, I combine my areas of expertise to help you in your parenting journey.
Thank you so much for giving us a great instructions
Awesome tutorial…thank you so very much for the step-by-step instructions, they are so appreciated. Such a cute idea and I hope it helped your little guy. Thanks again!
Thanks for the good, detailed instructions! 🙂
You’re welcome!