Ingredients
Method
- Line mini muffin tins with liners if you want to make 24 mini cups. If you'd rather make the larger cups, line 12 regular sized muffin cups.
- In a glass measuring cup with spout or other microwave safe bowl, melt half of the chocolate chips in the microwave on the 'melt' setting (you might have one, I just realized we do!) Or microwave for 30 seconds at a time, stirring to check when they're fully melted but not overheated.
- If using a glass measuring cup with a spout you can easily pour some chocolate into the bottom of each muffin cup. Otherwise, you can use a spoon to drizzle chocolate into the bottom of each muffin cup liner. Try to cover the bottom of the liner to give it a good base.
- Put the whole muffin tin in the freezer so the chocolate will solidify while you do the next step.
- Measure out the vegan butter and melt in a glass measuring cup or other microwave-safe bowl.
- In a large bowl, preferably a stand mixer, stir together the peanut butter, melted butter, brown sugar, vanilla, and salt. Stir until the brown sugar dissolves. You can surely mix by hand, I just love using our stand mixer.
- Gradually mix in the powdered sugar until combined.
- Take the muffin tin out of the freezer and place on counter.
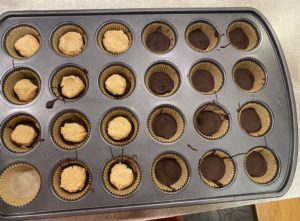
- Scoop some of the prepared mixture into each of the muffin cups, leaving a bit of space around the outside so chocolate will drizzle over it and trap the mixture inside. As you can see in the photo, half of the mini muffin tin has chocolate coating the bottom of the cup and the left side already has the peanut butter mixture over the chocolate.
- As you can see in the pictures, I rolled mine up in a ball and then placed them on top of the chocolate but you could flatten yours or whatever you'd like.
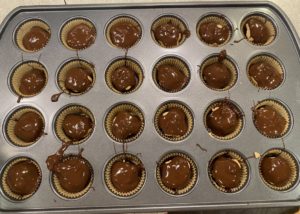
- Next, melt the rest of the chocolate, as you did earlier, which will go over the top of the mixture.
- Once the chocolate is melted, pour the melted chocolate over the top of the peanut butter mixture until covered and the chocolate is gone.
- If you have extra of the peanut butter mixture or chocolate, feel free to combine them and get a preview of the final product :) You have to make sure it tastes good, right?! :)
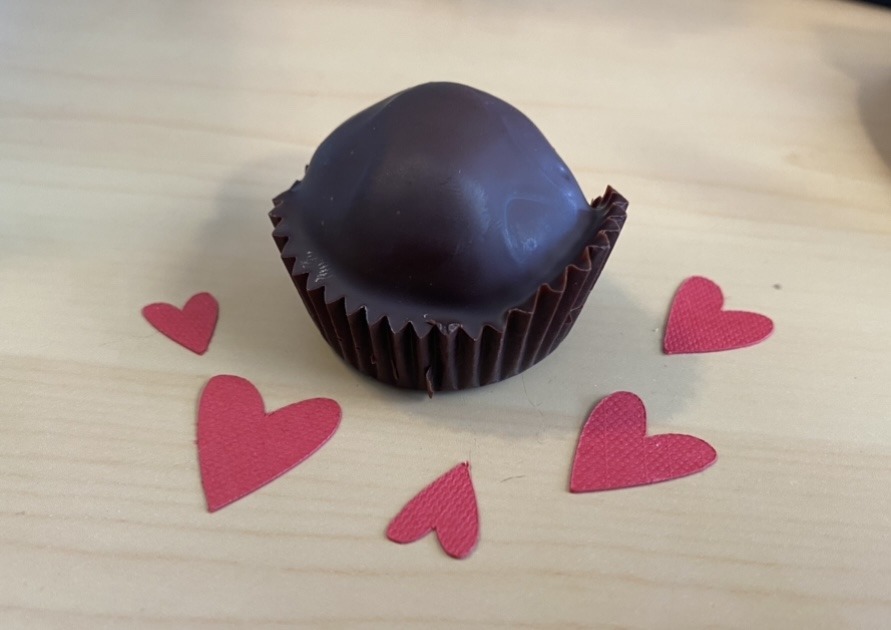
- Once complete, place the entire muffin tin in the fridge for the chocolate to harden for a couple of hours. I tend to just leave mine in the fridge so they aren't too melty when I eat them. Often I'll take one out a few minutes before I want to eat it and then come back to it so it's not quite as solid but really, either way they're so good. If you were setting them out for people to enjoy after a meal, I'd wait to set them out until guests are about to arrive. Don't worry about putting them back in the fridge, they'll surely disappear so you better grab one now! :) (This is a picture after I bit into one.)

Notes
Variations to this recipe include keeping it really simple and just having melted chocolate and peanut butter then melted chocolate on top. I honestly haven't tried that because I like this version too much to deviate!
You could also choose to make chocolate covered peanut butter balls instead of cups by waiting to melt chocolate until the peanut butter mixture is made and then rolling the balls of peanut butter mixture in chocolate. I haven't tried this but I'm going to next time.
I hope this recipe helps combat your craving for a chocolate covered peanut butter cup like it has mine!!